

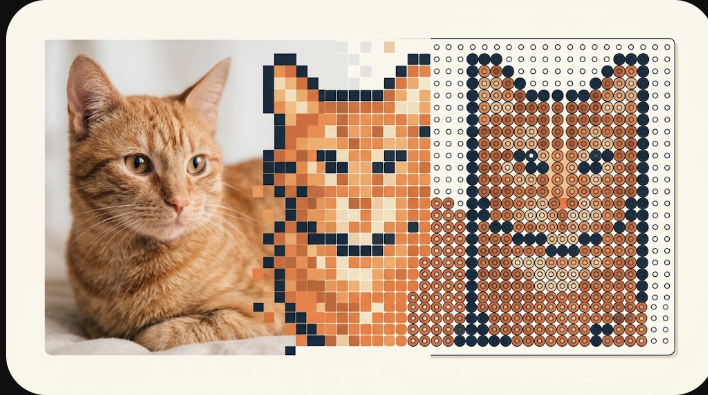
To turn an image into pixel art, you decide how many pixels wide the result should be, then let the tool sample your photo down to that grid — one flat color per cell. In the pattern maker you upload a JPG, PNG or WebP (up to 15 MB), set a width from 12 to 120 pixels, press Create preview, and get an editable grid you can recolor, count and download. The picture is processed entirely in your browser — nothing is uploaded to a server.
Open the maker and drop in an image →
What “image to pixel art” actually means
Pixel art is an image built from a small, deliberate grid of squares, where each square is a single solid color. The width you choose is the resolution: a 29-pixel-wide grid is chunky and poster-like; 120 wide keeps far more of the original detail. Height is not something you set directly — it follows the aspect ratio of the area you crop, up to a ceiling of 120 rows. So the two knobs that decide the look are the width (how coarse the pixels are) and the maximum colors (how many distinct shades the grid may use, from 1 to 12).
How the conversion works, step by step
- Add an image. Drag in a JPG, PNG or WebP up to 15 MB (and under 24 megapixels). There is a sample photo built in if you just want to try it.
- Crop, if you want. Only the area inside the outline is sampled, so you can pixelate just a face or an object instead of the whole frame.
- Set width and color count. Presets of 29, 58 and 87 pixels are one tap; the slider covers everything from 12 to 120. Max colors caps the palette between 1 and 12.
- Generate. The tool samples the cropped area into your grid and matches every cell to the nearest color in a real Perler bead palette (103 shades), compared in a perceptual color space so the matches look right to the eye rather than merely close in raw RGB.
- Preview, then apply. New results appear as a preview with Apply and Discard — they never overwrite your current grid until you say so. You can also “Compare size options” to see coarser and finer versions side by side.
Editing your pixel art
The grid is fully editable after it appears. Switch between three views — beads, grid and symbols — and use the tools that fit pixel work:
- Paint, erase and fill individual cells, with a color picker listing every shade by code and name.
- Replace all of one color with another in a single step.
- Undo and redo — one stroke is one Undo — plus zoom from 50% to 400% for precise cells.
- Protect cells you have already dialed in, so a later re-generate leaves them alone.
Downloading your pixel art
When the grid looks right, export it — every download is built from the confirmed version, not an unapplied preview:
- PNG — the pixel grid as an image, with empty cells left transparent.
- CSV — a bead/color list with the exact count of each shade.
- PDF — a printable reading chart that divides the grid into 29 × 29 sections with symbols and counts, on A4 or US Letter.
- JSON — an editable project file (grid, protected cells and, optionally, the original image) you can reopen later.
Pixel art you can actually build
Most “photo to pixel art” tools stop at a filtered image. This one is tuned so the result is something you can make by hand: each pixel maps to a real Perler bead color, the CSV tells you how many of each you need, and the PDF is a chart you can read next to a pegboard. If you only want the on-screen pixel-art image, the PNG export gives you exactly that. And because everything runs in your browser, your photo never leaves your device — the tool is free to use with no sign-up.
New to it? The companion guide, how to turn a photo into a bead pattern, walks through the same pipeline with a worked example, and preparing a photo first covers the crops and contrast that make pixel art read clearly.